This post will explain you about , how to start pivotal Gemfire on Windows
Step 1: What is Gemfire?
In-Memory Data Grid powered by Apache Geode
Scale your data services on demand to support high-performance, real-time apps
you can check more info on Gemfire docs
Step 2: Download - pivotal-gemfire-9.1.0.tar.gz using Download Pivotal Gemfire
Step 3: Unzip the downloaded file and set the PATH in environement variables.
Step 4: check the version of the pivotal gemfire, which is available in your system gfsh version --full
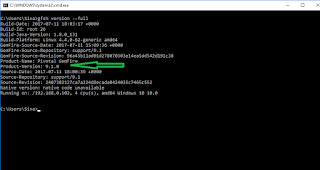
Step 5: Now we need to create a locator - Go to the place which ever the location you want to create locator in command prompt.
Step 6:Start the gfsh.bat file from command prompt.
Step 7: start locator --name=test --J=-Dgemfire.http-service-port=8080 --J=-Dgemfire.http-service.bind-address=localhost or
gfsh>start locator --name=test --J=-Dgemfire.http-service-port=8080 --J=-Dgemfire.http-service-bind-address=LAPTOP-2U8NKC7I
Starting a Geode Locator in F:\softwares\CloudFoundary_apache_gemFire\pivotal-gemfire-9.1.0\bin\test...
.....
Locator in F:\softwares\CloudFoundary_apache_gemFire\pivotal-gemfire-9.1.0\bin\test on LAPTOP-2U8NKC7I[10334] as test is currently online.
Process ID: 11740
Uptime: 3 seconds
Geode Version: 9.1.0
Java Version: 1.8.0_131
Log File: F:\softwares\CloudFoundary_apache_gemFire\pivotal-gemfire-9.1.0\bin\test\test.log
JVM Arguments: -Dgemfire.enable-cluster-configuration=true -Dgemfire.load-cluster-configuration-from-dir=false -Dgemfire.http-service-port=8080 -Dgemfire.http-service-bind-address=LAPTOP-2U8NKC7I -Dgemfire.launcher.registerSignalHandlers=true -Djava.awt.headless=true -Dsun.rmi.dgc.server.gcInterval=9223372036854775806
Class-Path: F:\softwares\CloudFoundary_apache_gemFire\pivotal-gemfire-9.1.0\lib\geode-core-9.1.0.jar;F:\softwares\CloudFoundary_apache_gemFire\pivotal-gemfire-9.1.0\lib\geode-dependencies.jar

Successfully connected to: JMX Manager [host=LAPTOP-2U8NKC7I, port=1099]

Cluster configuration service is up and running.

gfsh>start pulse
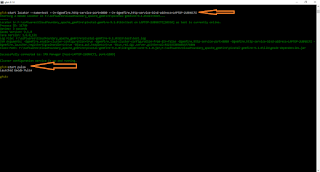
Step 8: Open the start pulse
Step 9: Open the browser and enter port as 8080 -> http://laptop-2u8nkc7i:8080/pulse and provide username as admin and password as admin
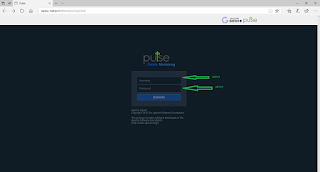
Step 10 cluster details will display after successful login.
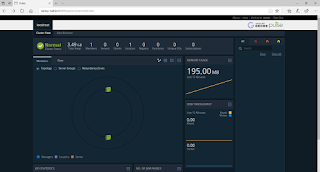
Thank you verymuch for viewing this post. If you like this post please write comment and share.
