I get a chance to post small topic related to webservice implementation with eclipse galilio.
This is the easy way to implement webservice.
This example is bottom up approach- from Java - to - WSDL
Step1 : Start Eclipse
Step2 : Open Eclipse-> File -> New Dynamic web project
Step3 : Give project name as you like (ex: test_webservice_server)
Step4 : Select Dynamic web module version as 2.4
Step5 : Select target run time as Apache tomcat version and specify the loaction of
tomcat server installed location.(Ex: c:/tomcat)
Step6 : Click on Finish button.
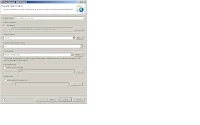
Before creating webservice we need to write the interface and implementation classes to which methods we need to create webservice.
In this example i created one interface called ArthimeticService, having different methods for doing arthemetic operations.
Then created one Class- ArthimeticServiceImpl which implemnts ,ArthimeticService interface.
Now It's time to create webservice.
Step1 : Right Click on the Created project
Step2 : Select New - Other - Webservice
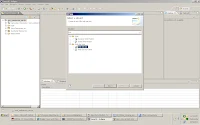
Step3 : Click On Next button.
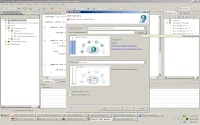
Step4 : Select Service Implementation(Which we already created ex:
ArthimeticServiceImpl)
Step5 : Click on Next- Next -(If screen shows the start server button click on that)- Finish
Once we completed above steps our webservice is ready to use by clients.
We need to check whether our webservice is working or not
Open Created wsdl under Webcontent folder
Go to the <wsdlsoap:address location> copy the value and paste in browser address bar with wsdl like the below.
http://localhost:8888/test_webservice_server/services/ArthimeticServiceImpl?wsdl
Please check the port your server is running(most of the cases it will be 8080)
Once this ready then we can create the client from any system.
Now the time for creating webservice client to access the webservice server.
Step1 : create new - project - dynamic web project (ex: test_webservice_client)
Step2 : Select Dynamic web module version as 2.4.
Step3 : Rigth Click on the created project- New - webservice client.
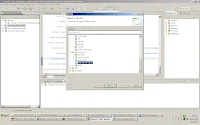
Step4 : Click on Next button.
Step5 : Select the service definition
Step6 : Click on the Browse button
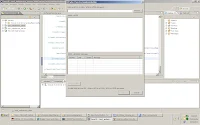
Step7 : Locate the webservice wsdl location
(where wsdl is running : ex http://localhost:8888
/test_webservice_server/services/ArthimeticServiceImpl?wsdl)
Step8: If webservice is running from another system
(instead of localhost mention IP address)
Step9: After Locating WSDL, click on OK- Finish
Step 10: Now we our webservice client also ready.
Step 11: Now we need test this application, wether it is working or not, for that i
am creating simple Test class which will call the Proxy class and
internally it will call the webservice server and will give the response
to us.
Ex:
package com.siva;
import java.rmi.RemoteException;
public class Test {
public static void main(String[] args) {
ArthimeticServiceImplProxy proxy = new ArthimeticServiceImplProxy();
int result = 0;
try {
result = proxy.add(20, 30);
} catch (RemoteException e) {
e.printStackTrace();
}
System.out.println("result is.." + result);
}
}
}
Now you will get result as -- 50
Like this webservices will work.
If you want to call this webservice from JSP and servletes
Then write jsp - with two input paramaters
servlet- will access the two values and return the result after
calling the webservice.
Once everything is completed try this url from your system
http://localhost:8888/test_webservice_client/
then provide input values and click on the Get result then result will display on the screen.
Now you can elaborate what ever ypou like and do modifications for your requirement.
Now you can download the source code from the following link.
DOWNLOAD WEBSERVICE SERVER CODE
DOWNLOAD WEBSERVICE CLIENT CODE
Wednesday, February 15, 2012
Thursday, December 15, 2011
Password Protected PDF
I got a time to post the important feature for web applications. User need to access statements through PDF. But that PDF needs to be Password protected.
To open the PDF, we can have different Password implemenations like (telephone no, DOB,Bank id, Last 4 digit of account no and name Etc...)
Now i am implementing password feature through the Random number Genaration.
import java.io.FileOutputStream;
import java.util.Random;
import com.itextpdf.text.Document;
import com.itextpdf.text.Paragraph;
import com.itextpdf.text.pdf.PdfWriter;
public class ProtectPDFPassword {
public static byte[] UserPassword= "UserPassword".getBytes();
public static byte[] OwnerPassword = "OwnerPassword".getBytes();
public static void main(String[] args){
try {
Document Document_For_Protection = new Document();
PdfWriter EncryptPDF= PdfWriter.getInstance(Document_For_Protection, new FileOutputStream(generatePin()+".pdf"));
EncryptPDF.setEncryption(UserPassword, String.valueOf(generatePin()).getBytes(),
PdfWriter.ALLOW_PRINTING, PdfWriter.STANDARD_ENCRYPTION_128);
EncryptPDF.createXmpMetadata();
Document_For_Protection.open();
Document_For_Protection.add(new Paragraph("Some Contents for Password Protection"));
Document_For_Protection.add(new Paragraph("Password is :"+"password"));
Document_For_Protection.close();
}
catch (Exception i)
{
System.out.println(i);
}
}
public static int generatePin() throws Exception {
Random generator = new Random();
generator.setSeed(System.currentTimeMillis());
int num = generator.nextInt(99999) + 99999;
System.out.println("Random number value---" + num);
if (num < 100000 || num > 999999) {
num = generator.nextInt(99999) + 99999;
if (num < 100000 || num > 999999) {
throw new Exception("Unable to generate PIN at this time..");
}
}
return num;
}
Required Jars's
itext-5.0.2.jar
bcprov-jdk15-136.jar
Wednesday, September 21, 2011
Create a Executable jar file from the command line or ANT build, Build Simple ANT File
Here i am posting how to make executable jar file from the command line as well through ANT tool, then how to run that executable jar file from the command prompt
This is the simple way to create executable jar file.
Step 1 : create folder inside your respective directory [Ex: c:/simple_java/src>]
Step 2 : create java file/files under this project[Package name is optional]
Ex: HelloWorld.java ,Person.java
under com.siva pacakage
Ex: c:/simple_java/src/com/siva>HelloWorld.java
Person.java
compile : c:/simple_java/src>javac com/siva/*.java
Step 3 : create one MANIFEST.MF or manifest.txt
under src folder.[this file can be created any place in your computer]
Ex: c:/>simple_java/src/manifest.txt
We need to mention the main class details.
Manifest-Version: 1.0
Main-Class: com.siva.HelloWorld
Step 4 : Now we need to create the executable jar file with the following command
c:/simple_java/src>jar cvfm simple_java.jar manifest.txt com/siva/*.class
Step 5: Run the executable jar file
c:/simple_java/src>java -jar simple_java.jar
Simple ANT build.xml- which used to compile , run and create the executable jar file which includes manifest file.
Before Starting with build.xml- We need to know What is ANT(Another Neat Tool]. Used for to build the application.
setting the ANT in our system.
Step 1: Down load the latest code from the ANT site .[Prefer to download the .ZIP file]
Download
Step 2: Unzip the Downloaded file, Then set the path.
Setting the Path
Right Click on My Computer ->Properties ->Advanced-> Environment Variables-> System variables -> select Path -> Edit ->give semicolon(;) end of the path value-> paste the ant location upto bin
Ex:
C:\apache-ant-1.8.2-bin\apache-ant-1.8.2\bin
Step 4: Create java programs related to your purpose.
Step 5: create build.xml file, then write the code inside build.xml, for
compilation, creating executable jar file the application.
Step 6: Run the build.xml-> by using the ant command
EX:
c:/simple_javaproject>ant
Down Load Source Code
Friday, September 16, 2011
Getting Started With DWR
This post contains the information about the DWR usage.
DWR- Direct Web Remoting is a java library that enables java on the server and JavaScript in a
browser to interact and call evch other as simply as possible.
DWR is Easy Ajax for Java.
DWR is a concept to implement Ajax based applications in java side.
I am posting the simple Dynamic Address Entry example. But you can modify this according to your requirement like fetching the data from data base, and assign that values to the respective inuput values. Here i am writing with simple hard coded data.
Follow below steps to learn DWR in minutes.
Step 1 : Start the eclipse- File -New- Dynamic web project- [provide project name] eg: dwr-project
Step 2: Open web.xml which is there in inside WEB-INF. Add the dwr related classes configuration.
Web.xml
<?xml version="1.0" encoding="UTF-8"?><web-app id="dwr" version="2.4" xmlns="http://java.sun.com/xml/ns/j2ee" xmlns:xsi="http://www.w3.org/2001/XMLSchema-instance" xsi:schemaLocation="http://java.sun.com/xml/ns/j2ee http://java.sun.com/xml/ns/j2ee/web-app_2_4.xsd">
<servlet>
<servlet-name>dwr-invoker</servlet-name>
<servlet-class>org.directwebremoting.servlet.DwrServlet</servlet-class>
</servlet>
<servlet-mapping>
<servlet-name>dwr-invoker</servlet-name>
<url-pattern>/dwr/*</url-pattern>
</servlet-mapping>
</web-app>
Step 3: create one foldercalled address inside WebContent
Step 4: create index.html inside address folder which we created in Step 3.
index.html
<html xmlns="http://www.w3.org/1999/xhtml"><head>
<title>Dynamic Address Entry Demo</title>
<meta http-equiv="Content-Type" content="text/html; charset=us-ascii" />
<script type='text/javascript' src='../dwr/engine.js'>
</script> <script type='text/javascript' src='../dwr/util.js'>
</script>
<script type='text/javascript' src='../dwr/interface/AddressLookup.js'> </script>
<script type="text/javascript" src='index.js'> </script>
</head>
<body>
<h1>Dynamic Address Entry With DWR</h1>
<p>This is a practical example of making form fill easier for users, and howsimple this is with
DWR.</p>
<div id="tabContents">
<div id="demoDiv">
<p>We can enter the below Post codes in the post code text box, and check the address fill up in the respective text boxes. In the same way we can save the details in data base and call the respective function.</p>
<ul>
<li>600041</li>
<li>400708</li>
<li>400707</li>
<li>508517</li>
<li>516269</li>
</ul>
<table class="plain">
<tr>
<td>Postcode:</td>
<td>
<input id="postcode" type="text" onkeyup="fillAddress()" onchange="fillAddress()"
onkeypress="fillAddress()"/>
</td>
</tr>
<tr>
<td>House name/number:</td>
<td><input id="house" type="text"/></td>
</tr> <tr>
<td>Line 2:</td> <td><input id="line2" type="text"/></td>
</tr> <tr>
<td>Line 3:</td> <td><input id="line3" type="text"/></td> </tr> <tr> <td>Line 4:</td> <td><input id="line4" type="text" size="30"/></td>
</tr> </table>
<p> </p> <p> </p>
</div>
</div>
</body></html>
In the index.html the bold lines are important. we no need to create AddressLookup.js, but we have to mention this. This should be same like a java class name.
Step 5: create index.js under address folder. this index.js is used to get the deatils from java and append the details in html page with out page refreshing.
index.js
function fillAddress() {
var postcode = dwr.util.getValue("postcode");
AddressLookup.fillAddress(postcode, function(address) {
dwr.util.setValue("house", address.house);
dwr.util.setValue("line2", address.line2);
dwr.util.setValue("line3", address.line3);
dwr.util.setValue("line4", address.line4);
});
}
Step 6: Create one AddressLookup java class under src folder ,
This class is having all the data. It might be database data or any type of data.
Here i am mentioning Hard coded data.
AddressLookup.java
package com.siva;
import java.util.HashMap;
import java.util.Map;
import org.directwebremoting.util.LocalUtil;
public class AddressLookup
{
private static final String LINE4 = "line4";
private static final String LINE3 = "line3";
private static final String LINE2 = "line2";
private static final String HOUSE_NO = "house";
/**
* @param origpostcode the code to lookup
* @return a map of postcode data
*/
public Map fillAddress(String origpostcode)
{
Map reply = new HashMap();
String postcode = LocalUtil.replace(origpostcode, " ", "");
if (postcode.equalsIgnoreCase("600041"))
{
reply.put(HOUSE_NO, "14/1 FLAT NO- G3");
reply.put(LINE2, "Kalakhestra Road");
reply.put(LINE3, "TiruvanMiyur");
reply.put(LINE4, "Chennai");
}
else if (postcode.equalsIgnoreCase("400708"))
{
reply.put(HOUSE_NO, "Door NO 201");
reply.put(LINE2, "Sakinaka Road");
reply.put(LINE3, "Airoli");
reply.put(LINE4, "Navi Mumbai");
}
else if (postcode.equalsIgnoreCase("400707"))
{
reply.put(HOUSE_NO, "Door No 202");
reply.put(LINE2, "Mullund Road");
reply.put(LINE3, "Vashi");
reply.put(LINE4, "Navi Mumbai");
}
else if (postcode.equalsIgnoreCase("508517"))
{
reply.put(HOUSE_NO, "Door No 345");
reply.put(LINE2, "Bangalore Road");
reply.put(LINE3, "Balaji Colony ");
reply.put(LINE4, "Tirupathi");
}
else if (postcode.equalsIgnoreCase("516269"))
{
reply.put(HOUSE_NO, "Door No 234");
reply.put(LINE2, "Bangalore Road");
reply.put(LINE3, "Kothapeta");
reply.put(LINE4, "Rayachoty");
}
else
{
reply.put(LINE2, "Postcode not found");
reply.put(LINE3, "");
reply.put(LINE4, "");
}
return reply;
}
}
Step 7: create dwr.xml inside WEB-INF
dwr.xml
<?xml version="1.0" encoding="UTF-8"?>
<!DOCTYPE dwr PUBLIC "-//GetAhead Limited//DTD Direct Web Remoting 2.0//EN" "http://getahead.org/dwr/dwr20.dtd">
<dwr>
<allow>
<create creator="new" javascript="AddressLookup">
<param name="class" value="com.siva.AddressLookup"/>
</create>
</allow>
</dwr>
Step 8 : Add below jars in the lib folder
bsf-2.3.jar
bsh-2.0b4.jar
commons-logging-1.0.4.jar
commons-validator-1.1.4.jar
dwr.jar
jakarta-oro-2.0.8.jar
log4j-1.2.12.jar
Step 9: Right click on the project and Run As Server- After successful run open the browser.
enter the post code which mentioned in the index.html.
Automatically the data has beed in filled in the remaining text boxes. in this way DWR work. you can explore more things on the DWR (http://directwebremoting.org/dwr/index.html)
Address bar has to be given in the following way
http://localhost:8080[portnumber]/dwr_project[projectname]/address/index.html
Step 10 : your DWR application started.
Download the source code for this project from here.
DOWNLOAD
SOURCE CODE
After downloading Unzip this and import into eclipse, and run project - Run as Server.
Subscribe to:
Posts (Atom)